Replacing your tub faucet might sound intimidating, but trust me, it’s not as hard as it seems. Whether you’re dealing with leaks, worn-out parts, or just want to give your bathroom a fresh look, updating your tub faucet is a project you can tackle yourself. With the right tools, some patience, and this step-by-step guide, you’ll be done in no time. So, why spend hundreds on a plumber when you can save big and learn a skill?
Listen up, folks. Replacing a tub faucet isn’t just about fixing a problem; it’s about empowerment. You’re taking control of your home, and that’s something to be proud of. Plus, it’s a great way to avoid those annoying water drips that keep you awake at night. Let’s face it, leaks don’t just waste water—they waste your sanity too.
This guide will walk you through everything you need to know about how to replace tub faucet. From choosing the right tools to troubleshooting common issues, we’ve got you covered. So grab a coffee, sit back, and let’s dive into the nitty-gritty of this DIY project.
Read also:Joe Rogan Weight And Height The Inside Scoop Youve Been Waiting For
Why Replace Your Tub Faucet?
Before we jump into the how-to, let’s talk about why you might need to replace your tub faucet in the first place. Sometimes, it’s not just about leaks—it’s about aesthetics, efficiency, or even safety. Here are a few reasons why you might want to consider swapping out that old faucet:
- Your faucet is leaking, and repairs aren’t cutting it anymore.
- The finish is worn out, making your bathroom look outdated.
- You want to upgrade to a more water-efficient model.
- Safety concerns, like a handle that’s too hard to turn for kids or seniors.
See? There are plenty of good reasons to make the switch. And hey, who doesn’t love a spa-like vibe in their own home?
Tools and Materials You’ll Need
Now that you’re ready to roll up your sleeves, let’s talk about the tools and materials you’ll need. Don’t worry, you probably already have most of these lying around:
Tools:
- Adjustable wrench
- Plumber’s tape
- Screwdriver (Phillips or flathead, depending on your faucet)
- Bucket or towels to catch water
- Channel-lock pliers (optional but helpful)
Materials:
- New tub faucet assembly
- Replacement washers or O-rings (if needed)
- Plumber’s putty or silicone sealant
Pro tip: Make sure to measure your current faucet before heading to the store. You’ll want to get a replacement that fits your existing setup. And hey, if you’re unsure, take a pic or bring the old faucet with you.
Step-by-Step Guide: How to Replace Tub Faucet
Alright, let’s get down to business. Here’s a step-by-step breakdown of how to replace tub faucet like a pro:
Step 1: Turn Off the Water Supply
This is crucial, folks. The last thing you want is a mini flood in your bathroom. Locate the shut-off valves under your tub or near your water heater and turn them off. If you can’t find them, turn off the main water supply to your house.
Read also:Conner Bedard The Rising Star Redefining The World Of Sports
Step 2: Drain the Remaining Water
Open the faucet to let any remaining water drain out. Use a bucket or towels to catch any drips. Trust me, this will save you from a soggy mess later on.
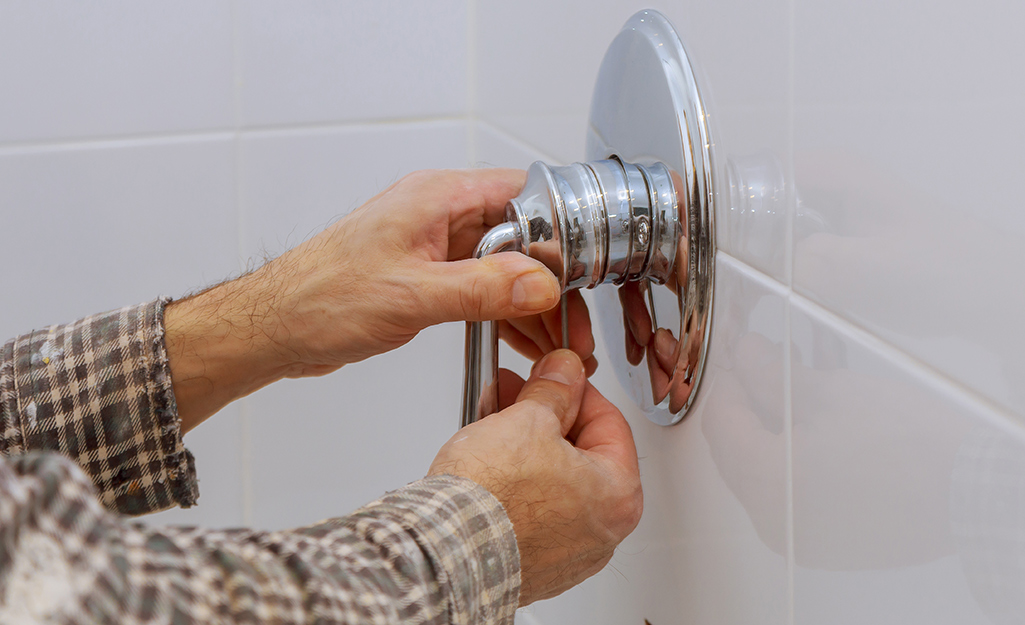
Step 3: Remove the Old Faucet
Use your wrench or screwdriver to remove the old faucet. Be gentle—if you’re dealing with old or corroded parts, they might break easily. If you’re struggling, grab those channel-lock pliers for extra grip.
Step 4: Clean the Area
Once the old faucet is out, clean the area thoroughly. Remove any old plumber’s putty or debris. This ensures a snug fit for your new faucet.
Step 5: Install the New Faucet
Follow the manufacturer’s instructions to install your new faucet. Apply plumber’s tape to the threads for a watertight seal, and use plumber’s putty or silicone sealant around the base if needed.
Step 6: Turn the Water Back On
Slowly turn the water supply back on and check for leaks. If everything looks good, give yourself a pat on the back—you’ve just completed a major DIY project!
Troubleshooting Common Issues
Even the best-laid plans can hit a snag. Here are some common issues you might encounter and how to fix them:
- Leaking after installation: Double-check your connections and make sure everything is tight. If the leak persists, you might need to add more plumber’s tape or sealant.
- Difficulty removing old parts: Use penetrating oil to loosen corroded parts. If that doesn’t work, you might need to cut off the old faucet with a hacksaw.
- Water pressure issues: Check your water supply valves and make sure they’re fully open. If the problem continues, there might be a blockage in your pipes.
Remember, patience is key. Take your time and don’t rush the process.
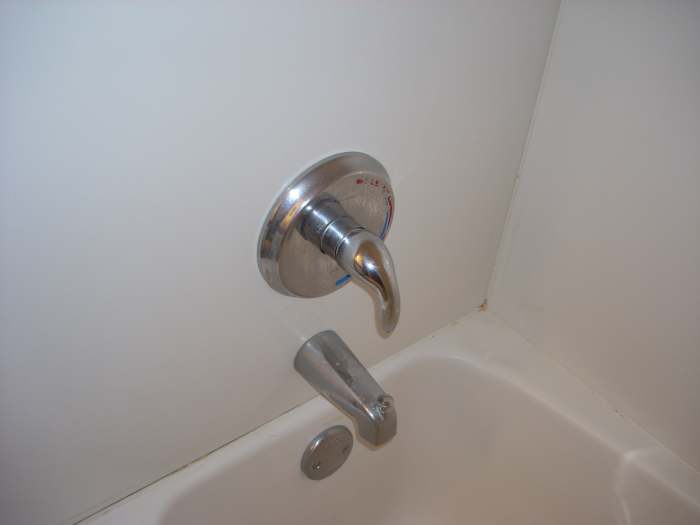
Choosing the Right Tub Faucet
With so many options on the market, picking the right tub faucet can feel overwhelming. Here are a few things to consider:
Material:
Brass is durable and corrosion-resistant, while chrome offers a sleek, modern look. If you’re going for a rustic vibe, consider bronze or copper finishes.
Style:
From traditional to contemporary, the style of your faucet should match your bathroom’s overall aesthetic. Don’t be afraid to mix and match for a unique look.
Water Efficiency:
Look for faucets with the WaterSense label. These are designed to save water without sacrificing performance.
And hey, don’t forget your budget. There’s no need to break the bank—plenty of affordable options offer great quality and style.
Cost Considerations
Replacing a tub faucet doesn’t have to be expensive. Depending on the brand and materials, you can find faucets ranging from $50 to $500+. Here’s a rough breakdown:
- Basic models: $50-$150
- Mid-range options: $150-$300
- Premium designs: $300+
Remember, you’ll also need to factor in the cost of tools and materials. But if you already have most of the essentials, you’re good to go!
DIY vs. Hiring a Plumber
Let’s talk numbers. Hiring a plumber can cost anywhere from $100 to $300+, depending on the job’s complexity and your location. If you’re handy and have the right tools, replacing your tub faucet yourself can save you a ton of cash.
But if you’re not confident in your skills or dealing with a tricky installation, it might be worth bringing in the pros. Just weigh the pros and cons before making a decision.
Safety Tips to Keep in Mind
Safety first, folks. Here are a few tips to keep you safe during the installation process:
- Always turn off the water supply before starting.
- Use gloves to protect your hands from sharp edges or chemicals.
- Work in a well-lit area to avoid mistakes.
- If you’re unsure about any step, don’t hesitate to consult a professional.
Your safety is worth more than any DIY project, so take the necessary precautions.
Maintaining Your New Tub Faucet
Congratulations, you’ve successfully replaced your tub faucet! Now, let’s talk about how to keep it in tip-top shape:
- Clean your faucet regularly with mild soap and water.
- Avoid using abrasive cleaners that can scratch the finish.
- Inspect for leaks every few months and address them promptly.
A little maintenance goes a long way in extending the life of your new faucet.
Final Thoughts
Replacing your tub faucet might seem daunting at first, but with the right guidance, it’s a project anyone can tackle. From choosing the perfect faucet to troubleshooting common issues, this guide has you covered every step of the way.
So, what are you waiting for? Grab those tools and get to work. And when you’re done, don’t forget to share your success story with us in the comments below. Who knows? You might inspire someone else to take on their own DIY project!
Table of Contents
- Why Replace Your Tub Faucet?
- Tools and Materials You’ll Need
- Step-by-Step Guide: How to Replace Tub Faucet
- Troubleshooting Common Issues
- Choosing the Right Tub Faucet
- Cost Considerations
- DIY vs. Hiring a Plumber
- Safety Tips to Keep in Mind
- Maintaining Your New Tub Faucet
- Final Thoughts
Thanks for reading, and happy DIY-ing!